Watch video here or read text below:
Uploading Blueprints
The blueprint itself must consist of a single image file that can be selected from the user's computer/mobile and must be of the jpg, png, bmp, or heic file format. If the blueprint is uploaded as a pdf, the blueprint must appear on the first page of the file.
Steps to upload the blueprint:

- Go to Blueprints in the sidebar
- Press Upload blueprint
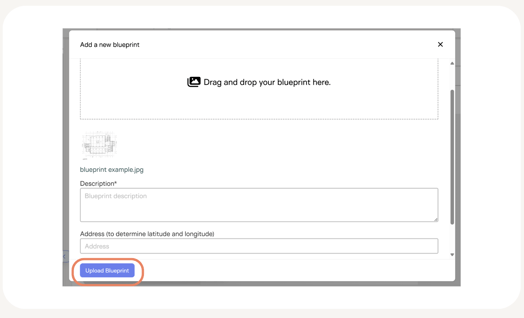
- Fill out name, description, and address and press Upload blueprint
Steps to attach blueprint and add sensors:

1. Go to the Group Hierarchy
2. Click the desired group
3. Go to the Blueprints tab

4. Find the uploaded blueprint and press Attach to blueprint. Multiple blueprints can be attached to the same group.
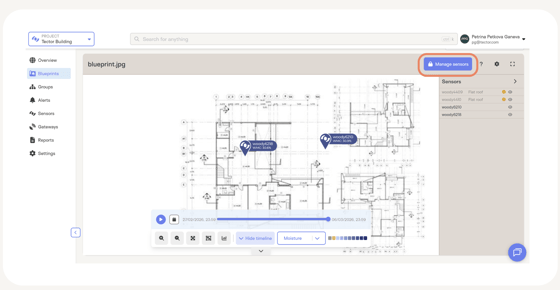
5. Once you have attached a blueprint, press on the Manage sensors button.
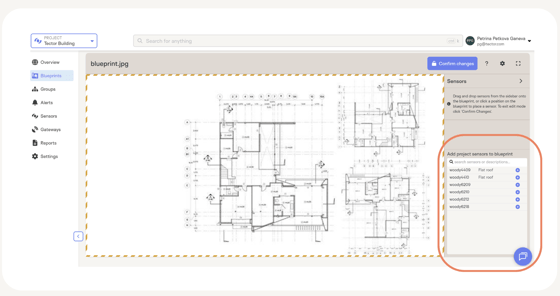
6. Now that you have attached the blueprint to a group, all the sensors in that group will appear in the Add project sensors field. You can also search for specific sensors by entering their ID or description in the search bar.
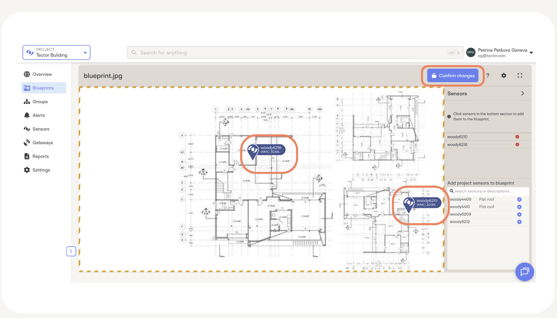
7. To attach sensors to the blueprint you can just drag and drop them to the desired location.
8. Remember to press Confirm changes to save your edits.
Important tips
- Ensure the blueprint file is in the correct format (JPG, PNG, BMP, HEIC, or the first page of a PDF).
- Organizing blueprints and sensors by group improves management and clarity.
By following these steps, you can ensure a smooth process for uploading blueprints and accurately attaching sensors, enhancing your project's monitoring and management.