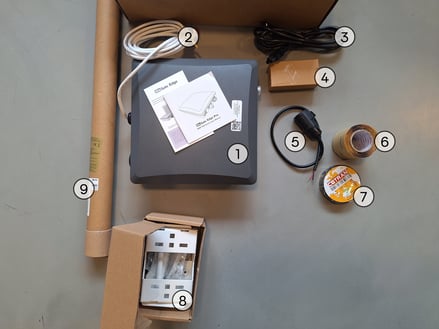
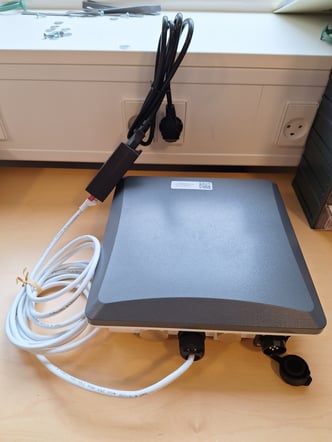
When you receive the outdoor gateway, make sure that you have all necessary parts. The shipment should consist of a large box with the gateway and all accompanying accessories, and a long cylindrical box with the antenna.
- Outdoor gateway
- Ethernet cable
- Power cord
- Power adapter
- 12V cable (used only with solar panel and battery pack)
- Waterproof tape
- Insulating PVC tape
- Mounting bracket
- LoRa antenna
The Tector gateways are always shipped with a pre-installed SIM card to ensure immediate connection to a mobile network.
Gateway Installation Guide
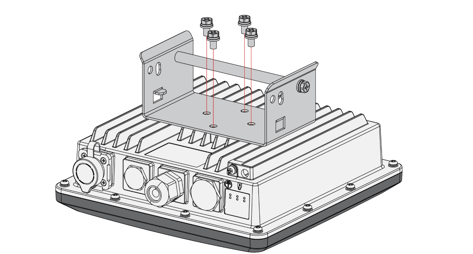
1. Fix the bracket (8) included in the mounting kit on the bottom of the gateway (1) with four M6*12 screws.
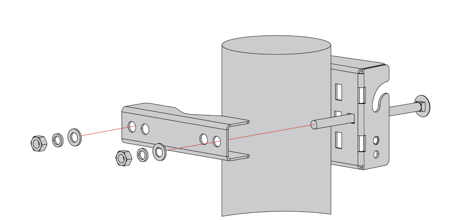
2. Position the pole clamps together around the pole, then tighten them with bolts, washers, and nuts.
3. Mount the gateway and secure it to the bracket.
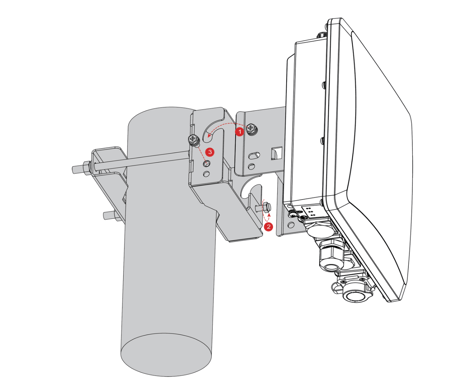
- Hang the enclosure on the pre-installed mounting hook (①).
- Use the adjustment screw (②) to fine-tune the vertical angle of the gateway. This allows you to correct any tilt caused by the enclosure‘s draft angle or pole misalignment, ensuring that the antenna is perfectly vertical.
- Once the alignment is complete, secure the enclosure by tightening the two M6×12 screws (③).
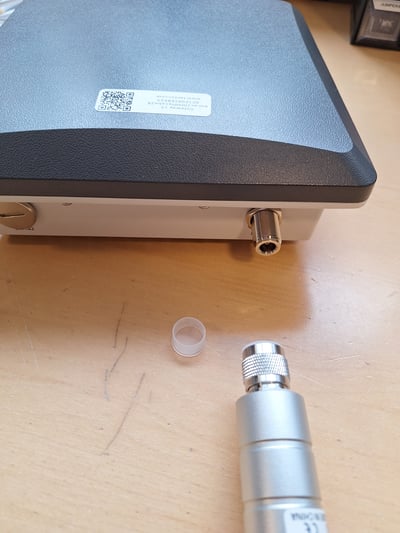
4. Attach the LoRa antenna (9).
Remove the plastic protection from the antenna and from the gateway and screw on the antenna to the LoRa1 port.
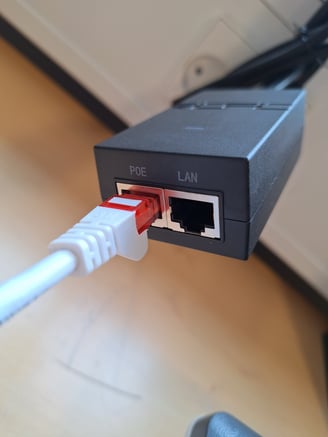
5. Plug in the gateway to power.
Connect the Ethernet cable (2) to the ethernet port labeled POE on the adapter (4). Connect the power cord (3) to the power port of the adapter and plug into a power outlet.
6. Ensure that the lights on the gateway are flashing:
- PWR, WLAN, LORA1 and LORA2 should be steady
- LTE should be flashing every few seconds
Weather protection
Rain Protection
To better protect the Ethernet cable gland and the antenna connector from the weather, you need to cover them with PVC tape.
- Clean the surface area of the connector that will be wrapped. Wrap a layer of PVC tape with a 50% overlap according to the rotation direction of the connector. Continue wrapping the PVC tape to about 10 mm below the end of the connector.
- Cut off about 50 cm waterproof tape. Stretch it to double the length. Wrap three layers around the connector with a 50% overlap. Hold the tape in place with your hand for a few seconds.
- Wrap three additional layers with PVC tape with natural uncoiling force and a 50% overlap. Make sure to cover the head and tail of the connector.
Lightning Protection
We also advise users to consider a lightning protection system to ensure a fully functional gateway without interruptions or damage.
- Antenna Grounding: It is recommended to install a lightning arrestor on all the antenna N-type terminals. The arrestors must be N-type Female to Male to fit the antenna and enclosure connectors. Ensure you use a 10 AWG or better wire to connect the screw terminals of the arrestors to the grounding rail mounted on the building wall (grounding bar in the case of field deployment).
- Gateway Grounding: Additionally, it is recommended to use another 10 AWG or better grounding wire to connect the screw terminal on the bottom-left side of the gateway casing to the grounding rail (bar).