How to install sensors for flat roofs
Step-by-step guide to installing Tector sensors on flat roofs
Note: This guide is specifically for sensors that come pre-installed on a timber block.
Identify sensor location:
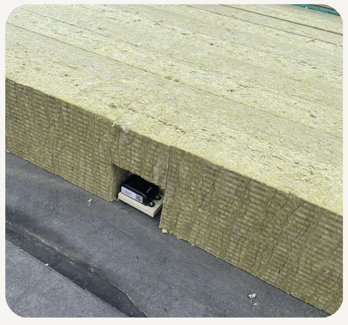
- Ensure the sensor is under the insulation but above the bottom membrane.
- Avoid placing sensors under drainage pipes or any other installations.
Prepare the insulation
- Cut a hole in the insulation slightly larger than the sensor.
- Ensure the sensor is not directly exposed to rain and cover it immediately after placement.
- Place the sensor on the membrane, avoiding aluminum or other materials from other roof installations.

Register the sensors
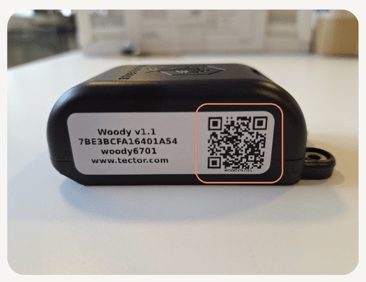
1. Scan the QR code:- Use your phone’s camera to scan the QR code on the sensor.
- Follow the setup instructions on your phone.

2. Fill out sensor details:
- Input the location details.
- Choose the sensor type.
- Upload two photos: one from a distance and one from +2 meters away.
- Fill out tags or copy from previously installed sensors.
- Note the sensor’s placement and ID on a physical blueprint.
- Attach the correct sensors to the right place on the digital blueprint in the application on your computer.
Final steps
1. Cover the sensor:- Place insulation above the sensor, ensuring it is properly covered and protected.

2. Repeat the process:
- Continue registering and placing sensors until all are installed.
Important tips
- Sensors should be installed under insulation but above the bottom membrane.
- Avoid any drainage, pipes, or other installations directly above the sensor.
- Ensure sensors are not directly exposed to rain and are covered immediately after installation.
Troubleshooting
By following these steps, you can ensure accurate moisture monitoring and avoid common installation mistakes for your flat roof project.